What earns the 7.6.
Research-led judgments, not a build log, instrumented test or Amazon star rating. Five equally weighted categories determine the displayed arithmetic-mean score.
Retro build appeal
9.0/10The body-inclusive kit and clearly documented simple mechanisms support the attraction of building a recognizable classic.
Package clarity
6.5/10Essential completion items are separate and the quoted ESC version conflicts between sources.
Venue and chassis fit
7.0/10Large tires and a wheelie bar suit modest open-area play; original suspension and steering limit precision expectations.
Service information
8.0/10Official assembly and parts diagrams are useful, with basic construction accessible to a patient builder.
Complete-start value
7.5/10The $146.30 retailer kit reference is attractive only after radio, servo, power and finishing costs are included.
The original van is the attraction, and so is assembling it
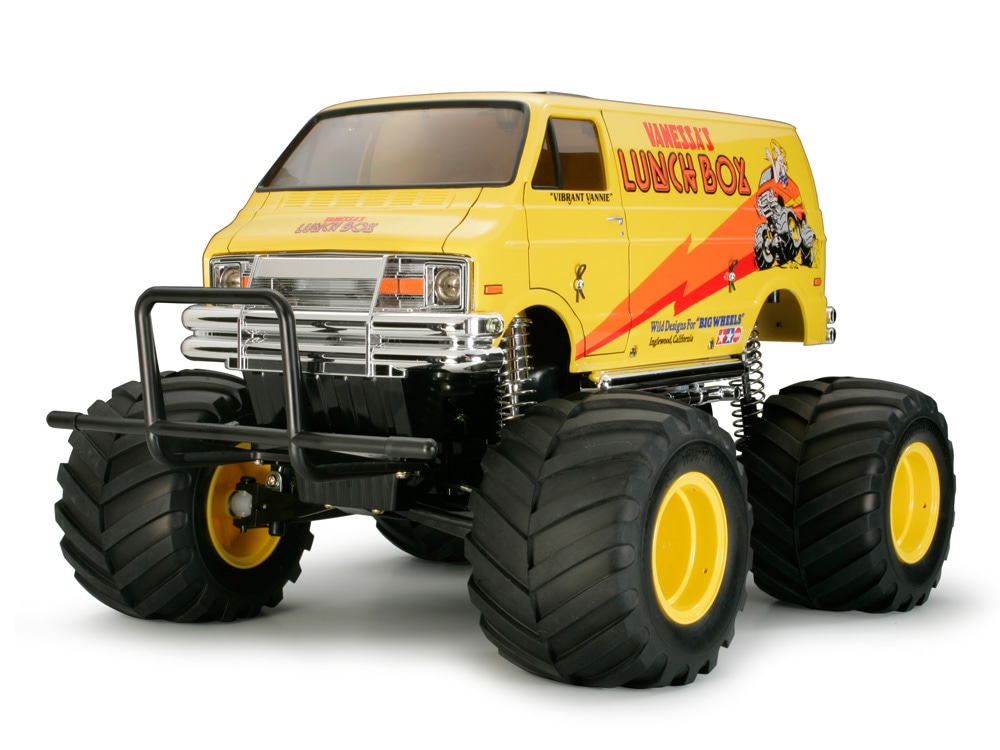
The Lunch Box is an easy car to recognize and an easy car to buy for the wrong reason. That yellow van on oversized tires looks ready to roll straight out of a product photograph. Item 58347 is an assembly kit. You are buying the parts for a complete vehicle with its body, plus a project that needs radio equipment, operating power and finishing work. If that sounds like the enjoyable part of the purchase, the original Lunch Box still has a clear audience.
Tamiya identifies this as the CW-01 reissue of a model first released in 1987, with the current item associated with the 2005 return. Its shape is not trying to imitate a modern race truck. The raised van, large tires and wheelie bar make the intended personality fairly plain. I would approach it as a mechanical model that can be driven, accepting the chassis layout as part of the experience rather than expecting an old design to win a contemporary handling comparison.
This review is specifically about 58347, commonly cataloged by distributors as TAM58347. It is not the separate Lunch Box EVO 58755, a small-scale Mini Lunch Box or a replacement shell. The Amazon API identity matches the original kit, but its electronics description differs from the current distributor page. We make that uncertainty visible below. This is a research-led buying guide based on manufacturer literature and attributable independent ownership coverage, not a claim that we assembled, timed or crashed this vehicle.
Sources: Manufacturer documentation ↗ · Manufacturer documentation ↗ · Retailer / distributor listing ↗ · Independent historical firsthand account ↗
Confirm the ESC, then complete the actual running basket
The manufacturer specifies the body-inclusive kit and stock 540 motor. The original manual shows the assembly sequence and the separate radio and operating-power requirements. Horizon's current TAM58347 listing additionally names a TEU-105BK forward/reverse brushed speed controller. Amazon's exact-product API features instead mention a 101BK controller. That is an unresolved electronics-version conflict, not permission to combine whichever features are more attractive. Ask the seller to identify the controller in the actual box before choosing batteries or assuming a particular setup procedure.
The missing components include a two-channel transmitter with compatible receiver, a steering servo that fits the chassis, a suitable drive battery and matching charger, plus whatever cells the selected transmitter requires. Paint, basic assembly tools and finishing supplies also belong in the budget. A spare receiver from another radio brand is only useful if its protocol matches the transmitter; a servo on the bench only saves money if its size, output and connection suit the installation. Existing equipment should be checked, not counted automatically.
Lay out the kit inventory against the manual before cutting parts from their sprues. Identify the electronic components actually supplied and read their separate instructions alongside the chassis manual. Regional editions and older inventory can make a generic online contents list incomplete. Keep the body and its clear parts protected while assembling the mechanical sections. A patient inventory session is more useful than rushing to buy another motor, because it prevents a stalled build caused by one missing receiver, an unsuitable servo or the wrong charging connection.
Sources: Manufacturer documentation ↗ · Manufacturer documentation ↗ · Retailer / distributor listing ↗
A simple rear-drive mechanism is part of the learning value
The standard 540 brushed motor drives the rear wheels through a sealed gearbox containing a differential. That is the useful mechanism to understand while building: the motor turns a reduction train, the differential permits left and right rear-wheel speed differences, and the front wheels provide steering without driven shafts. The sealed housing helps protect the gears from ordinary dirt ingress, but it does not turn the whole truck into a waterproof assembly or make contamination elsewhere irrelevant.
Follow the gear and bearing-support assembly drawings carefully and check free movement at each stage before closing the gearbox. A wrong spacer or screw that seems insignificant on the bench can create drag that is much harder to diagnose once the vehicle is complete. Tamiya lists ball-bearing compatibility as an option; this is not a factory full-bearing specification. If choosing bearings during the build, use the correct model-specific sizes rather than buying a bag labeled only for a broad Tamiya family.
The stock motor is a sensible starting point because it lets you establish whether the completed chassis runs freely and the controls work predictably. A faster motor changes demands on the speed controller, battery and drivetrain and should not be treated as an isolated purchase. We have no measured speed or runtime for this exact package. The wheelie bar explains the truck's intended character, but it is not evidence of a repeatable stunt outcome on every surface or with every battery. Learn the standard configuration before treating voltage or motor changes as a solution.
Sources: Manufacturer documentation ↗ · Manufacturer documentation ↗
Set the controls for the controller actually in your box
The kit does not dictate a single supplied radio setup because the transmitter, receiver and steering servo are separate purchases. Choose a matched system and follow its binding and failsafe instructions, then follow the actual speed controller's calibration procedure. Instructions for a TEU-105BK should not be silently applied to an unidentified controller just because the vehicle name matches. Neutral, forward, brake and reverse operation need to be confirmed with the wheels clear and the body off before the first ground run.
Plan around the documented 7.2V pack format, checking chemistry, connector, dimensions and controller support rather than assuming a higher-voltage pack is a convenient substitute. A conventional compatible NiMH setup can be an appropriate completion route, but it still needs the correct charger and the actual electronics' approval. We do not infer LiPo low-voltage protection from a retailer's generic electric-vehicle label. If you want a different chemistry, have the identified controller and battery instructions establish the complete configuration first.
Center the steering servo electrically before attaching its output hardware at the position shown in the manual. Adjust neutral alignment mechanically where appropriate, then use radio trim for the remaining correction. Check steering travel in both directions without forcing the mechanism against its stops. This is a useful first-kit lesson: a car can respond to the transmitter and still be poorly assembled or overdriving its steering. Keep the early setup restrained and inspect the mechanism if the servo buzzes or the wheels do not return consistently.
Sources: Manufacturer documentation ↗ · Retailer / distributor listing ↗
Accept the original layout before budgeting to change it
The front uses independent swingarms, and the rear gearbox sits in a rolling-rigid arrangement. The stock spring dampers are friction units, not the optional oil-filled CVA equipment mentioned in Tamiya's product specification. This layout is a major distinction from a modern independently suspended basher. It helps explain why the kit is mechanically approachable, but it should temper expectations about suspension control and steering precision. Installing every possible upgrade is not necessary to recognize what the standard design is meant to be.
Big Squid RC's Doug described building and running his modified 58347 in a July 2014 article. He highlighted troublesome stock steering and bump-steer behavior despite enjoying the truck's character. That is a useful independent warning about the original platform, attributed to his example rather than presented as our measurement. His altered electronics, battery and body choices also mean his particular driving impressions are not a controlled test of the exact current Amazon box. Historical enthusiasm does not erase the steering reservation.
During assembly, prioritize the specified washers, free movement and correct servo-saver installation before experimenting with linkage modifications. Inspect how the front wheels move as the suspension travels, and keep both sides consistent. A stronger servo alone cannot remove geometry built into the chassis. If precise line placement is your main objective, compare a different complete vehicle before buying the Lunch Box plus a sequence of corrective parts. The attraction here is a characterful retro build; you should be comfortable with its original mechanism before spending to reshape it.
Sources: Manufacturer documentation ↗ · Manufacturer documentation ↗ · Independent historical firsthand account ↗
Big tires help, but a tall van still needs considerate driving
The 115mm tires give the Lunch Box more obstacle clearance than its van silhouette initially suggests. That does not establish a measured climbing limit, and the high body is part of the tradeoff. A dry open section of smooth pavement or packed dirt is a sensible place to learn steering and throttle response after the build. Short, even grass may be usable where load and clearance remain reasonable; deep lawn, wet ground and hidden obstacles are much less helpful first-session choices.
Use broad turns and observe the chassis before trying to make it change direction abruptly. The raised body and large tires mean that grip, body movement and stability need to be judged together. A wheelie bar provides a contact point during rearward rotation, not a guarantee against a rollover or damage. It does not protect the front or sides when the truck meets a fixed object. Give the first course generous space and remove the temptation to use curbs as a ready-made jump ramp.
The vehicle's age as a design also matters for operating expectations. Do not read an outdoor photograph as a modern waterproofing specification. Avoid water unless every installed component and the relevant manufacturer instructions explicitly support the intended exposure, and make dry running the simple initial plan. Stop if the motor or controller behavior changes, the drivetrain binds or the vehicle struggles continuously. We do not promise a battery-pack duration: the assembled electronics, chosen pack and surface have not been tested together by RC Car King.
Sources: Manufacturer documentation ↗ · Manufacturer documentation ↗
Follow the hard-body paint instructions, not a generic cart suggestion
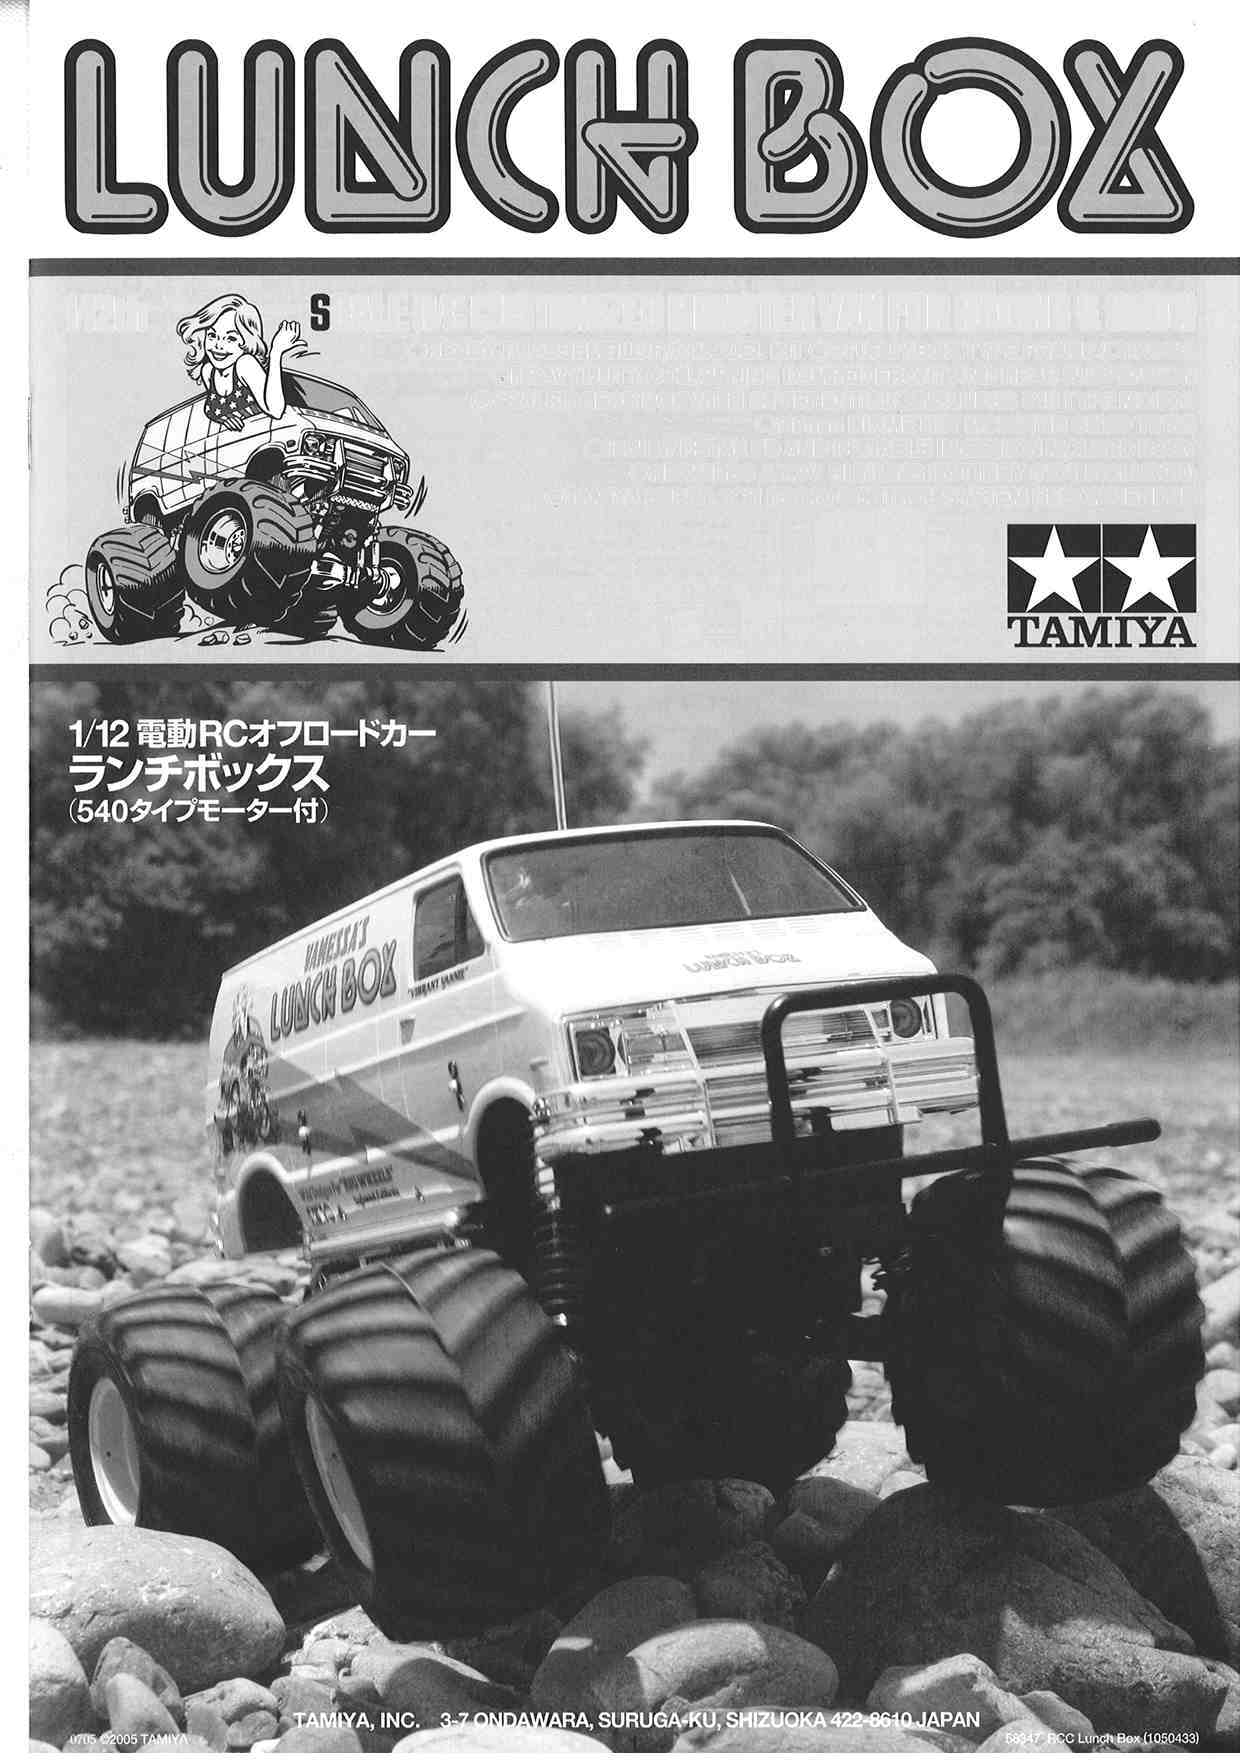
The molded hard van body is part of the kit, so this is a complete-vehicle build within our current review scope. It is not a bare chassis that still needs a shell purchased separately. The familiar yellow finished product image illustrates an assembled example, rather than guaranteeing a painted vehicle arrives in the box. The broad sides create room for a personal finish; there is no need to invent a period racing history to enjoy designing a van you want on the shelf.
There is a concrete paint-source conflict. Horizon's completion list says Tamiya PS paint, while the official 58347 manual's equipment page specifies TS-16 yellow and named bottle paints for the hard-body finish. Follow the exact manufacturer's body and paint instructions rather than copying a generic polycarbonate-body recommendation. Confirm material compatibility, prepare the surface and let the finish cure according to the paint directions. Painting takes planning and drying time, so do not schedule it as the last rushed step before a promised first drive.
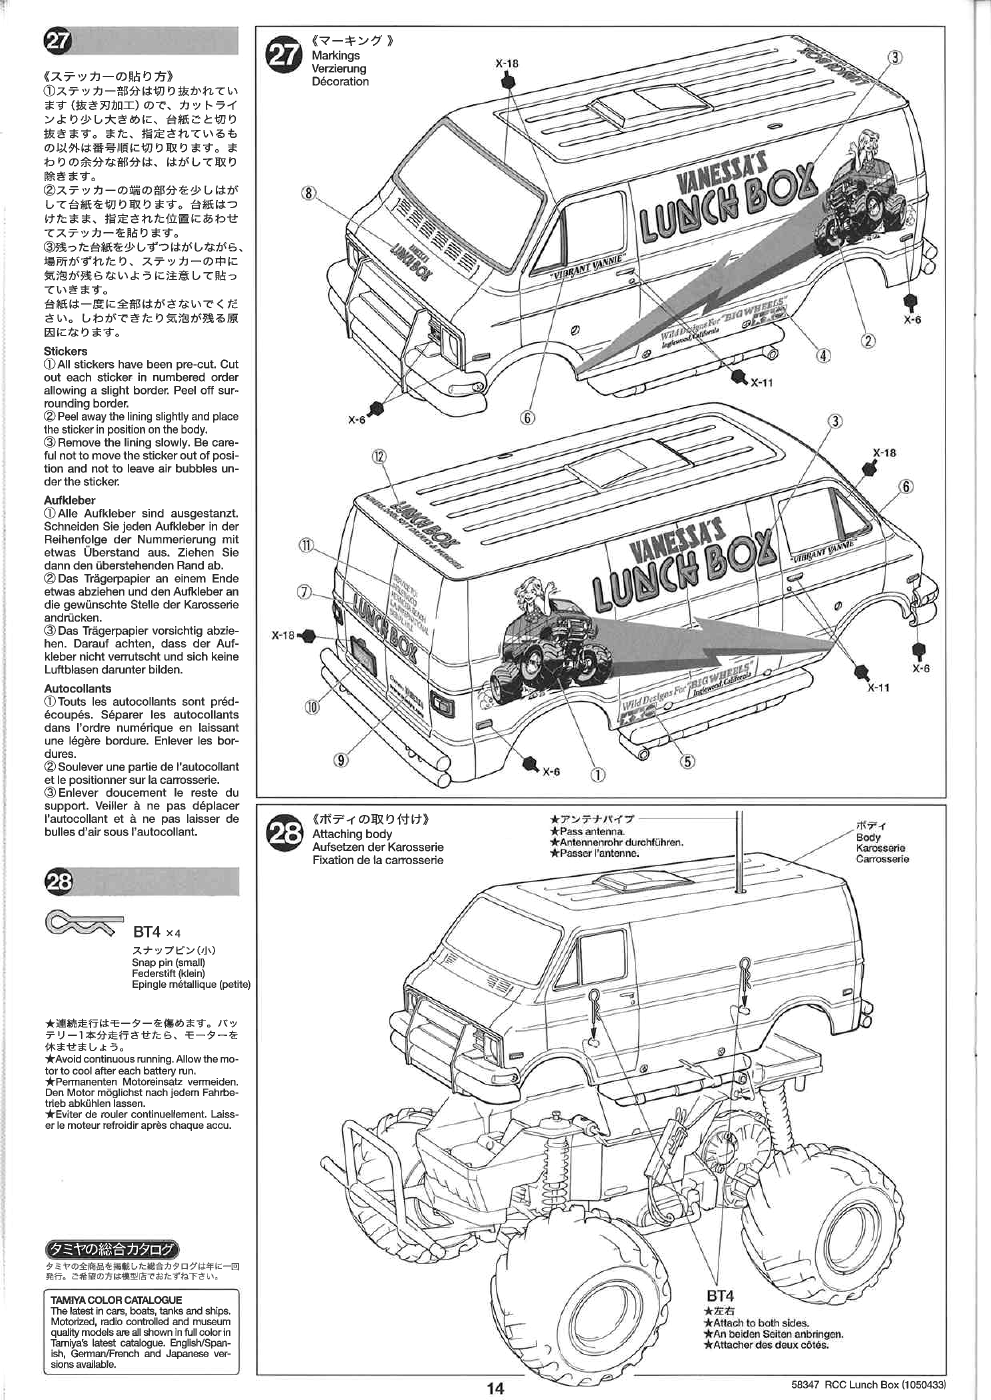
The manual's body-installation drawing shows how the finished shell attaches to the assembled chassis. Keep the mounting points and body clips accessible, and route installed wires so removing the body does not pull on an electrical connection. Inspect the hard shell and its mounts after a tumble, especially if preserving the finish matters to you. The large body is a design attraction and a service consideration at the same time. We reproduce the official finished photograph and manual imagery with attribution, rather than borrow an owner's customized build as if it were our own.
Sources: Manufacturer documentation ↗ · Manufacturer documentation ↗ · Retailer / distributor listing ↗
The kit price is the beginning of a first-car budget
Horizon Hobby's listed TAM58347 kit reference was $146.30 when checked on 15 October 2026. That is the exact original-kit retailer reference used here, not a manufacturer MSRP and not a price for a fully assembled, painted running vehicle. Big Squid RC's much lower 2014 purchase discussion is historical context, not today's offer. Amazon's API verified the exact product identity but supplied no displayable price in our research snapshot; the verified affiliate link remains useful without fabricating a current offer.
For a first RC purchase, add a matched radio and receiver, a suitable steering servo, the supported drive battery and compatible charger, transmitter cells, paint and tools you do not own. Confirm whether the offered box contains the named ESC before declaring that part included in the completed basket. Keep required completion equipment separate from optional bearings, oil dampers and appearance changes. Otherwise, an inexpensive body kit can become an unexpectedly expensive project before it has ever been driven in its intended standard form.
We have not supplied invented component prices or claimed a precise all-in total. Obtain a current basket quote using the actual radio, servo and power combination, then add tax, shipping and finishing supplies. An existing hobby bench can change the economics substantially, but only compatible items count as savings. If you primarily want driving this weekend, compare that completed cost and your available building time against a complete RTR. If assembly and painting are the reason you are buying, those hours are part of the value rather than merely a delay to be minimized.
| Item | Package status | Cost basis |
|---|---|---|
| 58347 body-inclusive kit and 540 motor | Included kit components | $146.30 Horizon retailer reference |
| Brushed ESC | Horizon lists TEU-105BK; Amazon feature names 101BK | Confirm actual boxed unit; no second controller purchase assumed |
| Transmitter + matched receiver | Required separately | Obtain exact system quote |
| Compatible steering servo | Required separately | Confirm size and output fit before pricing |
| Supported 7.2V pack + compatible charger | Required separately | Confirm chemistry, fit and connectors against actual ESC |
| Transmitter cells | Required for selected radio | Quantity and type depend on chosen transmitter |
| Body paint, tools and finishing supplies | Additional as needed | Follow TS/bottle-paint guidance in the official manual |
| Complete first-start total | Not established by kit price alone | $146.30 plus missing compatible equipment, finishing, tax and delivery |
Sources: Manufacturer documentation ↗ · Retailer / distributor listing ↗ · Independent historical firsthand account ↗
Choose a different purchase when the job is different
The Tamiya Midnight Pumpkin is the close archive comparison for a buyer who likes the CW-01 concept but prefers a pickup silhouette. Read its exact-kit review and contents rather than assuming every regional package includes identical electronics. Similar underpinnings mean the comparison is principally about body preference and the completed ownership basket, not an automatic escape from the original chassis's steering and suspension character. Buying the other shell because it is temporarily cheaper can be false economy if the van is what you wanted to build.
The separate Lunch Box EVO, item 58755, deserves its own evaluation if revised hardware is central to your purchase. Do not attribute its features to the 58347 listing, even if a search engine places both generations beside the same yellow van photograph. Check the exact official item number and included equipment. A seller using the word Lunch Box without an identifiable SKU has not supplied enough information for a reliable comparison between the original reissue and that later model.
For an assembled first basher, the ARRMA Gorgon MEGA in our archive is a different complete-vehicle route worth comparing at the full starting cost. It changes the task from selecting radio electronics and building a model to checking a defined RTR package and suitable terrain. The choice should follow what you want to do with your time. We have no physical comparison test between these cars, and a higher editorial score for one audience would not make another vehicle pointless for a builder who specifically wants a retro van project.
Sources: Manufacturer documentation ↗ · Manufacturer documentation ↗
Buy the project with open eyes and a complete parts basket
The original Lunch Box works best as a deliberate choice. The van body, simple rear-drive gearbox, large tires and assembly process form a package with a clear identity. It can introduce a patient builder to how an RC vehicle is put together without demanding a bare-chassis body search. That is the argument for 58347. It does not require claiming modern steering precision, exceptional crash resistance or a performance figure we have never measured.
The practical reservations should remain visible at checkout. The kit needs substantial completion equipment, the stock dampers are friction units, and the independent historical steering criticism is relevant context for the original layout. The controller discrepancy needs a seller answer rather than an editorial guess. The paint discrepancy already has a stronger source: the actual kit manual. These details are more useful to a new builder than calling every part an upgrade opportunity and pretending the kit price represents the full cost.
I would buy it when building, painting and owning this particular van are the point, then begin with a conservative compatible power setup and the original motor. I would skip it for an immediate-running gift or a buyer who primarily wants a modern precisely controlled basher. The five category scores above are equally weighted buying judgments for that retro-builder audience. Confirm 58347, establish the missing equipment and read the manual before starting, so the project becomes a satisfying build rather than a box waiting on one overlooked purchase.
Sources: Manufacturer documentation ↗ · Manufacturer documentation ↗
Know exactly what you’re ordering.
Published manufacturer specifications for model 58347. Conflicting figures are flagged rather than silently corrected.
| Official manufacturer item | 58347 · Lunch Box (2005) |
|---|---|
| Distributor / Amazon part | TAM58347; API model 58347 |
| Not this vehicle | Lunch Box EVO 58755 / Mini Lunch Box / replacement body |
| Scale / format | 1/12 · body-inclusive assembly kit |
| Chassis | CW-01 box-frame/tub construction |
| Motor | Included 540 brushed electric |
| Drive | Rear-wheel drive, geared differential |
| Gearbox | Sealed housing; not a whole-vehicle waterproof rating |
| Front suspension | Independent swingarms |
| Rear suspension | Rolling rigid |
| Stock dampers | Spring/friction units; CVA oil dampers are optional |
| Tires | 115mm diameter, manufacturer specification |
| Dimensions | 385 × 290 × 225mm, manufacturer product data |
| Listed weight | 1560g historical manufacturer reference; not our assembled weight |
| Bearings | Ball bearings are optional; no factory full-bearing claim |
| Body | Molded hard van body, finishing required |
| Wheelie bar | Included rear bar |
| ESC | Source conflict: Horizon TEU-105BK / Amazon feature 101BK; confirm box |
| Radio / servo | Required separately |
| Operating power | Supported 7.2V pack and compatible charger, separate |
| Paint basis | Official manual: TS-16 yellow plus named bottle paints; verify finish plan |
| Measured speed / runtime | No RC Car King measurements |
Sources: Manufacturer documentation ↗
The questions worth asking.
Is the Lunch Box 58347 ready to run?
No. It is a complete body-inclusive assembly kit. It needs building, finishing and separate radio/receiver, steering servo and operating power equipment.
Is this the Lunch Box EVO?
No. This review is the original CW-01 Lunch Box reissue, item 58347 or distributor TAM58347. The Lunch Box EVO is a separate item, 58755.
Which ESC comes in the Amazon kit?
The exact API feature names 101BK, while the current Horizon TAM58347 page names TEU-105BK. We cannot resolve the actual boxed version from those conflicting descriptions. Ask the seller before selecting batteries or following controller-specific setup instructions.
Should I buy PS paint for the body?
Follow the official 58347 manual for this hard body. Its equipment page specifies TS-16 yellow and named bottle paints; Horizon’s PS completion suggestion conflicts with that manual. Confirm material compatibility before painting.
Does it have oil shocks and ball bearings as standard?
No factory oil-shock or full-bearing package is established. The stock dampers are spring/friction units; Tamiya lists CVA dampers and ball bearings as options.
Can I use a LiPo battery?
Do not assume compatibility or low-voltage protection. Identify the actual supplied ESC, then follow its battery limits and the battery/charger instructions. This review does not endorse a LiPo conversion based on a generic listing.
How this review was researched.
Amazon API ASIN B000BMVIGW is TAMIYA, PartNumber TAM58347 and Model 58347. Horizon documents the distributor-prefixed identity; official manufacturer item is retained as 58347. ESC source conflict remains explicit. Manual paint instructions override the generic PS suggestion. Manufacturer images show assembled examples, not an RTR box or our own build. No speed, runtime or reliability measurements are invented.
I would buy the original Lunch Box for the building and the comical van, accepting its old suspension layout. This is a research-led purchase assessment; I have not built or driven the example reviewed here.
- Tamiya official 58347 product · original CW-01 specifications and finished photograph; page information dated 21 July 2005 ↗Manufacturer documentation · checked 15 Oct 2026
- Tamiya official 58347 assembly manual · equipment, paint, construction and body mounting ↗Manufacturer documentation · checked 15 Oct 2026
- Horizon Hobby exact TAM58347 listing · dated USD reference and TEU-105BK/PS-paint descriptions ↗Retailer / distributor listing · checked 15 Oct 2026
- Big Squid RC · Doug · 31 July 2014 original 58347 build and driving account; modified example, historical context ↗Independent historical firsthand account · checked 15 Oct 2026
First published 15 October 2026. Exact kit identity, original manufacturer data, manual illustrations, current retailer reference and API metadata checked; controller ambiguity disclosed.
THE GARAGE EDITOR’S CALL
A memorable first retro build for the buyer who wants the build
Shortlist 58347 when the van body and assembling a simple chassis are the point. Confirm the electronics in the actual box and budget the whole operating package. Choose an RTR for immediate driving, or evaluate the separate Lunch Box EVO if revised hardware matters more than the original layout.
Check exact car on Amazon ↗